• Welcome to MX Bikes Official Forum. Please login or sign up.
 
April 24, 2024, 02:31:26 PM

News:

MX Bikes beta18j available! :)


Show posts

This section allows you to view all posts made by this member. Note that you can only see posts made in areas you currently have access to.

Topics - Asdrael

21
Suggestions and wishlist / BikeEd and EngnEd suggestions
February 09, 2017, 10:25:43 AM
After spending way too much time on BikeEd and EngnEd, I found a few features that would have made the process easier and way faster.

Important:
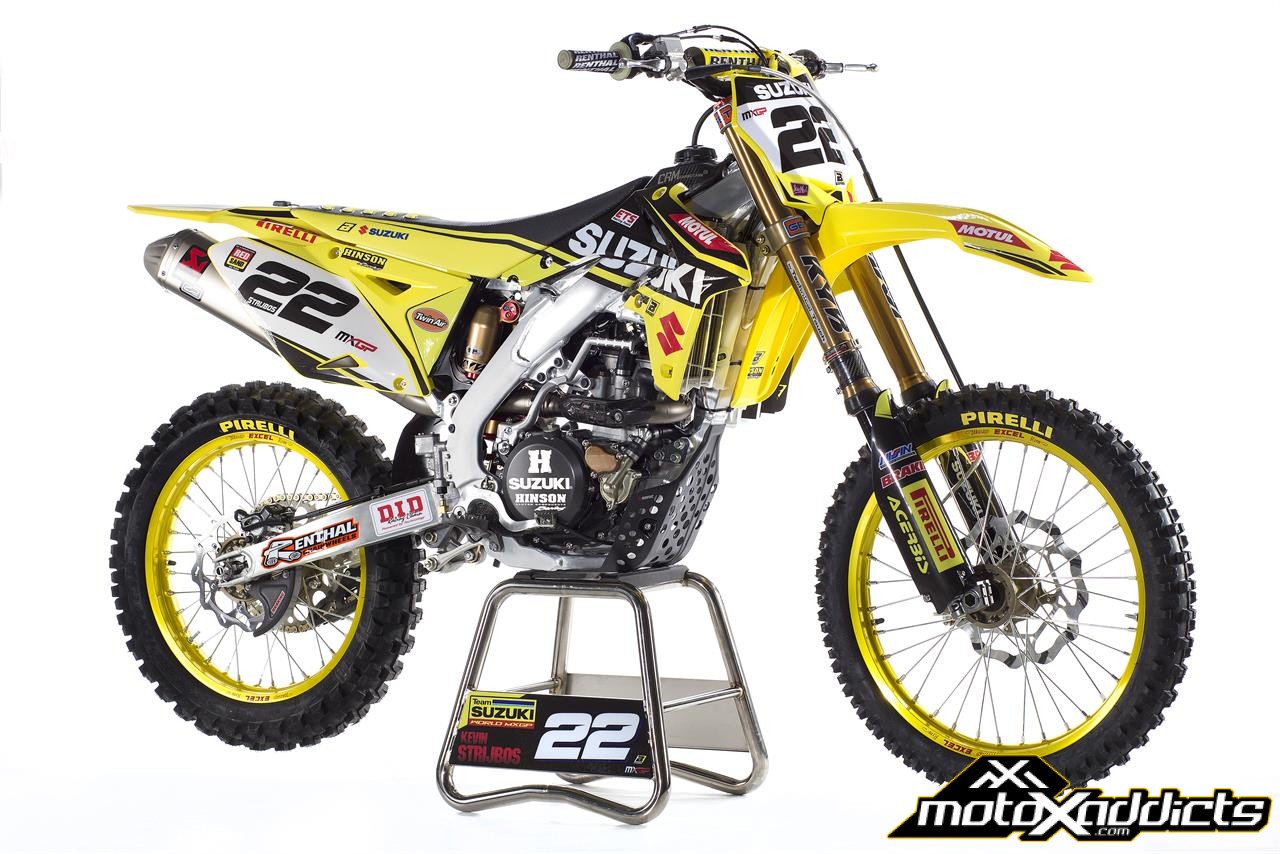
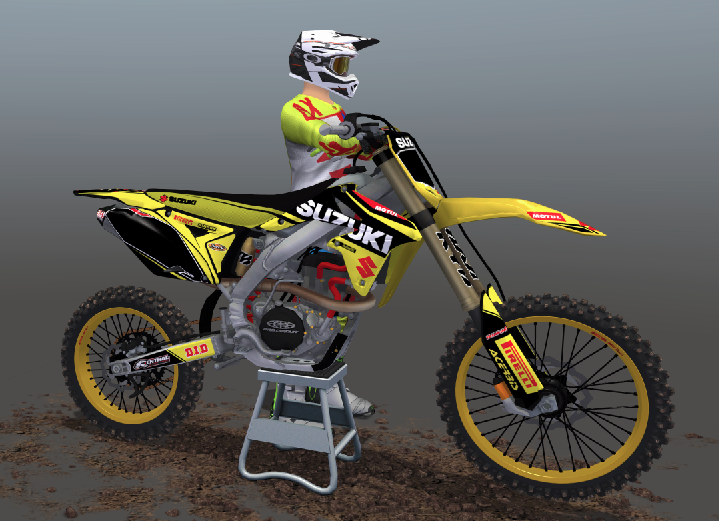
- BikeEd and Engn: Ability to chose my background image and recenter it.
          I just want to be able to put the stock picture/Dyno of the bike I am working on as background for alingment purposes. Would speed things up 5x for the geom, 2x for the engine.
- BikeEd: An additional "cursor" to move the entire rear geometry at once, even the parts linked to the chassis (like RSusp Upper).
          Makes no sense in terms of mechanics, but that would be a killer to adjust wheelbase when the rest of the geometry is on point.
- BikeEd: a potential modifier key to move ONLY one cursor, without the other ones attached to it. Example: ctrl-click rod moves ONLY the rod. (or is this impossible currently? Not sure it is because I can move the rod, then move the other way RSusp lower and I acheive the same thing it just takes more time).

Medium Importance
- BikeEd: Have more parameters in the information section of BikeEd: linkage rod arm length for example and ideally, move this information to the "Test" window along with the rear shock graph.
- BikeEd: An estimate on the weight repartition between front and rear.
- BikeEd: A sag test would be great.

Low importance
- BikeEd and EngnEd: resizer graph/cursors andchange their color, or change the color of the background. Stuff is hard to read at my age ;)

Great work though, they are very flexible and you can reach pretty good results, but it's sometime unecessarily painful to do so.
22
OEM is short for original equipment manufacturer and is often used in the spare parts market to indicate parts made by the manufacturer at the original specifications.

Since we have what is probably the most accuracy moddable game engine for dirt bikes in MXBikes, the opportunity to import in game new models using as much of the manufacturer's data as possible is there.

After spending a long time gathering the data on Yamaha dirtbikes, messing around in BikEd, fiddling with EngnEd and generally throwing stuff into the .cfg files, I think I figured out a decent way to import in MXB all the real relevant values. Here is a lengthy tutorial to do the same, made using the 1.22 BikEd and 1.0 EngnEd at the time of MXB Beta5. It is lenghty. 33 pages in word. But, imo, very well worth it when you have the end results - you will be positively surprised if you follow this.

-now updated for Beta8 release-

What this is not is a guide on how to import a 3D model. I can't do it properly so other people will be miles better than me for that.

We'll be touching (each section is a post, click for direct link):


Chapter I : Chassis and geometry

      1.    Geometry data and general frame adjustement
              a.         Gathering data
              b.         Frame adjustements

      2.   Fork setup
              a.   Your BikeEd, Test and Params windows
              b.   Your Fork Geometry points and moving them around

      3.   The Rear Shock
              a.   Textbook
              b.   Real data and Photoshop
              c.   Fine tuning the shock

      4.   The wheelbase

      5.   Finishing touches
              a.   Checklist
              b.   damping, rebound and springs: the .cfg file

      6.   Troubleshooting - Geometry


Chapter II : Engine modifications

      1.   Gathering data

      2.   yourbike.cfg and sfx.cfg

      3.   Making yourbike.engn and my toolkit
              a.   Engine and .engn file
              b.   Checklist

      4.   Troubleshooting - Engine


Chapter III : Polishing yourbike.cfg


              a.   Lock angle
              b.   Weight and fuel
              c.   Brakes
              d.   The .ini file


General tips and tricks and FAQ


Update list.
23
Support / Engine values in the .cfg: Engine inertia
February 05, 2017, 11:18:00 AM
Hi,

Trying to figure out proper engine importing in your engine PiBoSo. I am however dumbfounded by this value:
engine
{
Inertia = 0.005


What is it? Where does it come from? I'm hoping to understand why you have the values you are using, which are:
250f: 0.004
350f: 0.005
450f: 0.005 (? same as 350?)
250: 0.005 (a 2 strokes with more inertia than 4 stroke of same cc?)

Both models that have ? are marked as WIP in the bikes page though.

I'm running a few tests right now, but not sure what I should be looking for nor where I should start from. Any help appreciated.
24
Suggestions and wishlist / Engine maps
January 30, 2017, 05:25:47 PM
Could we have access to different engine maps, as what is possible in GP Bikes? Some motocross bikes now come with easy map changing options, and I think it would be pretty cool to enable that in MXB to give modders more options.
25
>>> PLEASE READ THIS <<<
>>> CURRENT VERSION: BETA6  : v4.1 <<<


Shortcuts for the lazy, con't complain if you have no idea what's going on :p
Download links:
Yamaha 2 strokes YZ125 and YZ250 standard v4.0
Yamaha 4strokes YZ250F and YZ450F standard v4.0

Yamaha 2 strokes YZ125 and YZ250 OEM v4.0
Yamaha 4strokes YZ250F and YZ450F OEM v4.1
Necessary Geo Tyre Mod for the OEM bikes to work.


[/b][/size]Here it is. The complete line of Yamaha's big offroad bikes, 2016 version – this means YZ 125, 250F, 250, 450F.


The initial 4 strokes model was created by ExtremeManiac (initial release here), and the 2 strokes model done by Benji_D. Both transfered to mxb by Stonerider with the help of Pacopastor. Credit goes to them for the fundation work!

The bikes have undergone extensive work and rework on different aspects of their physics implementation. This is why two different packs are being released.

You can download and enjoy both. They can coexist on servers, np. They are different variations on the same theme, and all count as different bikes for the game.


Standard pack

Work in the standard pack has focused on geometry. It is now, to the best of my knowledge and of all the data I could gather, 99% accurate for all 4 models.

         Fork: Accurate travel, rake angle, offset, trail, position, stock spring strength and preload within stock range. Weight positioned the best I could.
         Shock: Accurate travel, complete geometry including linkage system, position on chassis, stock spring length,  strength and preload within stock range.
         Chassis: Accurate wheelbase, weight positioning to accommodate new geometry.
         Suspensions: Slightly modified the values for the suspensions in the .cfg file so it works with the geometry.
         Rebound was compared to videos for average settings, while shock was adapted from MSM and other models.
         250, 250f, 450f engines: those are stock, copied from the MSM. Also stock: everything that has to do with the engine (ratios etc).
         125: Custom engine with 100% matching power curve, primary and secondary ratios, gear ratios. Brake torque and engine inertia downscaled from 250x stock values.
         Correct weight, spring and preload values, brake size and torque. The only thing missing is the blue smoke and the sweet sweet smell of premix.

Known issue: the 250 looks a tad off as it is directly converted from the 125. The geometry is exact, making the model look slightly stretched. Went with a special paint too.

You will find the 125 and 250F under the MX2 category. The 250 and 450F are under MX1.

In my opinion, the behaviour of those bikes is awesome. But try it for yourself. One thing I can say for sure as the owner of a 125YZ: yep, that's a 125YZ and it's fun as hell. Start saving for clutches. The 450F becomes usable, and actually pretty fun. Bits of advice: the 125 almost requires an analog clutches (yes you use it like a mofo in real life to get out of corners too). The 450F relies on good throttle control but you can (and will) power drift dozens of meters.

Download 2016 Yamaha Pack standard v4.0:

Yamaha 2 strokes YZ125 and YZ250 standard v4.0
Yamaha 4strokes YZ250F and YZ450F standard v4.0


OEM Project pack

Ok peeps. This time it's personal. Gonna sound a bit pompous but damn, I worked hard on this, and I am extremely pleased with the results.

Made it as my personal goal to fit in ALL the factory values I could find. Weight? Check. Torque? Check. Brake disc size? Check. Hell, I even included the owner manuals of all bikes in their folder. Check it for yourself.

This means this OEM pack is basically the Standard pack with the following upgrades:

          Engines: All engine data incorporated, >98% accuracy on the dyno curves. 3 to 4 different engine maps based on suggested settings coming with Yamaha's GYTR Power Tuner for the 250f and 450f.
          Ratios: Primary, secondary, gearing ratios all exact and at stock settings + .cfg allows typical secondary drive ratio modifications.
          Weight and fuel: Weight and fuel capacity corrected for each model, including inertia.
          Brakes: Disc size (and associated torque) exact.
          Suspension settings: All the suspension settings have been expanded for realism. 20 clicks on everything (shock should be 30 for rebound but the engine limits it at 20).
          For convenience, I added 2 softer and 3 harder settings on everything (so your Standard pack setting +2 = your OEM setting). Surprise: every value is set to factory.
          Yes, the 450F has 5 clicks at the front in compression damping. Also increased the choice in rear spring strength for realism, and dialed in the exact strength and preload values.
          Tyres: I am going with Geo's Tyres latest update for this.. Check it out (v1.5).
          Basically the same grip as stock on dry terrain, but now rain changes something, sand feels like sand, and changing tyre compound makes some kind of sense (softer the tyre, the higher the grip but the higher the resistance. More grip? Lose that HP).
          The reason is, I am NOT going through the pain of adapting everything to see people fly over sand and puddles of mud, nonono. This is required! Download IN HIS THREAD HERE
          125: The 125 is exactly the same as the standard pack but uses GeoTyres now.

You can have a glimpse at the whole process in the Tutorial I posted earlier: Project OEM: BikeEd, EngnEd and .cfg for accurate factory specs.

HOSTS AND PLAYERS BEWARE: Since the engines and tyres are different from what we normally do, I created new categories for this: "MX2 OEM" and "MX1 OEM". This will reduce bike selection clutter and provide a convenient wait to enable one type of bike or the other on a server. I fully intend those categories to be used only for bikes that have achieved full realistic value sets for both chassis and engine parts. Please do not throw random shit in it, I will be a major ass and do my best to prevent crap from going on to servers. Also, please keep it with GeoTyres for this purpose.

Shortly: this is freaking awesome. You can feel the engine difference; the tyres bring it to the next level when you change surfaces and conditions. And yes, bikes are competitive with the MSM in terms of engine, they just feel different. For example, the YZ250F is less "peaky" but a bit fuller than the MSM..

Download 2016 Yamaha Pack OEM v4.0/4.1:

Yamaha 2 strokes YZ125 and YZ250 OEM v4.0
Yamaha 4strokes YZ250F and YZ450F OEM v4.1
Necessary Geo Tyre Mod for the OEM bikes to work.


For what it's worth: 125 and 450F, both OEM. You might not see me riding anything else anymore, even in SX.


Enjoy! I put my heart and soul into this, I bled coffee. Let me know if mistakes slipped in.


Feedback welcome – especially if you prove me wrong on any value you'll find (within 1 or 2%, don't be an ass ;) )

>>> 18.03.2017 : VERSION 4.0 RELEASE : BETA6 PATCH <<<

- Chassis flex added
- 4 strokes now have different engine maps based on Yamaha's GYTR Power Tuner suggested settings

26
Paints / 2016 TLD GP Pinstripes
January 26, 2017, 11:56:12 PM
Decided to import my favorite set in game. Contains rider paints and gloves and around 20 color schemes. Enjoy!


https://mega.nz/#!VcJVwIYC!9PTc83QxAyI2IFwDUNd4noAGz2V2pu4xl7iFvEOxWSM

(Feedback welcome, as usual.)

27
Paints / Normal map - how to?
January 25, 2017, 03:09:54 PM
Trying to figure out how to make a normal map for a rider skin, and scratching my head.
- Which channel is the important one?
- Which format should the _n file be?
- How do you actually make the map?

Any advice welcome!
28
Track Editing / Asdrael's SX track creation kit.
January 06, 2017, 07:48:57 PM
Here goes: the kit I used to make the series of SX tracks. I'm typing this rather fast as I'm leaving for two weeks of holidays tomorrow and have stuff to do. I just wanted to let you guys experiment for two weeks. This will most likely get revisited at some point, end of the month most likely. You have 24h to ask questions ;)

By no way do I consider this the ultimate track creation kit, even for SX. It was convenient for me and gave results I was satisfied with. There are tons of ways to do things differently, and probably all of them are better than mine. But if it can get more people into building, I think it's good enough!


Wall of text incoming.


This is the latest version that I used both for JS7-SXN and JS7-SXS, my hardest and my easiest track. That should tell you it's flexible enough, and it's all in the placement of obstacles (scaling was changed by less than... 3% on average between the 2 tracks.)

This folder contains:
  • A PSD file with my standard obstacles.
  • A SX.grd gradient file for photoshop.
  • My params.ini file for the map.bat and an .amb file. (it gives "good" single point stadium lighting that helps see obstacles). Remember to turn the shadows back on in the params.ini, I just usually don't compile them to save time in the track building stage!
  • A sketchup file with textured tough blocks and finish line / starting gate scaffold, and the night skybox.
  • Two sketchup file with the Annaheim stadium and the San Diego stadium, adapted from Sketchup workshop data with power of 2 textures.

I will only explain how to use the PSD the way I did to make an SX track. This is not a tutorial on how to make a track, what is map.bat for etc. Other topics cover that. A complete overview of my workflow can be found in the topic Building a Replica SX – A2 2016 with extensive details. This post also implies you are decent at photoshop or at least make an effort.

Disclaimer: my 100% official Photoshop is stuck in French. I'm translating to English from memory of an old PS I used years ago, sorry if it's not on point.


How to use the PSD?

All of this will come from the principle that you will be using my scaling. Which is the following (copy/paste in your THT/HMF file):

Scaling for THT and HMF files:
samples_x = 2049
samples_z = 2049

data = heightmap.raw

size_x = 210
size_z = 210
scale = 3.7


This, in combination with the PSD, will give you a 1.05 scaling (more or less). I strongly recommend building the whole, complete track this way. Should you want to change the feel slightly, do it at the end by adjusting the X/Y/Z scales. At this stage, do it in 2 or 3% increments as the effect is huge already (with 5% change you'll turn an easy section into a pro-only rythm of doom).

Before Obstacles

You need a track. With my scaling, ago for around 80-90px width on the main track. Don't forget to have around 20-25px between lines for obstacle dirt falloff + blocks.

Obstacles in the PSD

The PSD contains several layers, each of them having a standard version of an obstacle as per their name. Those obstacles have several properties:
  • They are directional: the way they are placed on the PSD is meant to be ridden from TOP to BOTTOM.
  • Their XY size is correct for the scaling I use.
  • They are already "curved" but not "smoothened". More on that later.
  • They are NOT scaled in height. This is down at the end using a trick due to my scaling. More on that later.
  • "Trip Ramp Std" is the take off for the SX triple as well as the Finish line. The middle jump of an SX triple is the 5' scaled down (approx 145px long). The landing is the take off, turned around, scaled longer (approx 180px).
You'll notice there is no template for berms, nor for whoops. More on that... later!

Combining obstacles and scaling them

1.   Golden rule: start by making a copy of the layer containing the obstacle you want to use. Each obstacle should be one layer at least at the building stage. Always rotate the obstacles BEFORE smoothing them. Also, do not use "Normal" in the layer dropdown menu. Use "Overlay", otherwise joining obstacles will produce wierd glitches. Place your obstacle in X/Y this way, and rotate them.

2.   Smooth the obstacles. Select the WHOLE LAYER and apply a Gaussian filter. Between 7 and 10 pixel seems to be good at that scale. (I personnaly used 8 90% of the time).

3.   Scale the obstacle vertically. If you stick with my technique and scaling, hover your mouse cursor AFTER SMOOTHING on the whitest part of the obstacle. You will get, in the information panel, a "black" % value. Once again, with my scaling: 10% = 1 feet. So a 5' jump should be 50% at it's highest point. A 3' should be 70% (it's a black scale and we are making white, remember?). Adjust that by changing the opacity of the layer. I advise being conservative at first – do your 3' at 73% and your 5' at 57% or so. Careful: your opacity per cent does not translate directly in blackness % , it is NOT linear.

4.   Get in game, test your line. At that stage, move obstacles in the PSD layer per layer. Select the obstacle, keyboard move it by 1 or 2 steps, change height by 1 or 2%, etc.

Whoops

I did those depending on how I wanted them each time. In the gradient file, there is are 2 "Whoops" template. What I did was apply the gradient to a box in a new layer, then apply a Curve to it to round up the mounds (a 75% 50% for example). Then apply some Gaussian Filter on it (don't hesitate to do a double 5+5 instead of a single 8 for example, you can get some pretty interesting results). Then set their height. Don't be over optimistic, 15% is tall enough atm.
Do not forget to make a single entry whoops that is 2/3 of the height of your whoops section, otherwise you will jump when approaching the section. You need something to lift the wheels smoothly to put you on top of the whoops.

Berms

I also did those on the spot. However, I used Gradients present in my gradient file. This is the most complicated section to get right.
  • Make a new layer.
  • Select a box as wide as your turn with some extra room.
  • Apply the Berm gradient in a round shape in Normal mode.


    Then, select the Berm smooth gradient, and multiply it onto of your already present gradient, in the direction of the track, from ALMOST one end of the box to ALMOST the middle of the box.


    Then, apply a curve to it to sharpen it (like 50% 75%).


  • Finalize by rotating if needed (hint: turn it a bit more toward the end of the turn to give more grip getting out), and smoothen (Gaussian Filter friend to the rescue, 7 or so), and finally set its height using the opacity %.
Quite frankly, this will make or break a section more than jump spacing or height. That is why I do them by hand, and redo them, and reredo them... until I'm happy. I vary the width, radius, curve, height a lot.

Tables and other obstacles.

In the gradients again you will find different table types. You'll have to experiment depending if the table is a landing, a take-off, how wide you want the flat section, etc. Sometimes, you can add a little bump to help jumping out. I have found "Table Flat" to be the best, possibly giving it a bump at the end. Remember: tables are often 4' high with a 2 or 3' kick for on/off.

For dragonsback: Just use the 2' template, and then add a SkyJump gradient in a layer that you will place underneath 3 or 4 of those. Tip: leave the first "jump" clean, and just place the SkyJump gradient after. You will need to work on the SkyJump gradient Curve and Smoothing and Size a bit, depending on what you want your obstacle to be in the end (a jump? A landing? A staircase?).

For "artificial" ruts, just use a Gaussian filter on the pen tool.

General Tips and Tricks

Adjusting the X/Y dimension can do more than adjusting the height, but you must smooth with the Gaussian filter only as a last step. Otherwise, you will get a stair effect.

It's generally a good idea to have the first jump of a rythm section slightly overscaled.


To conclude in a pedantic way: have fun with this, but be aware: it's a lot of effort to come up with a ridable track that has several lines. The only thing I ask in return is that people do not half-arse the job and actually make an effort to release proper tracks with this kit. We don't need another pile of betas and unfinished tracks.

is this actually the link? Why yes it is!
29
Paints / 2016 Suzuki MXGP Factory
January 05, 2017, 10:16:16 AM
Here is a 90% replica of the 2016 Suzuki Factory MXGP team bike. It is made to fit on Damien's RMZ bike (v1.5 in case the 3D model ever changes). Made from a good sticker kit picture I found. Some liberties have been taken to accomodate the 3D model and spice it up a little as the original is a bit dull.

Pack has black number plates for 250 and white for 450. Right now, the game numbers don't show on it which I think is a model issue.

Enjoy, and feedback appreciated.


DOWNLOAD ON MEGA.NZ
Edit: and my own skin here: https://mega.nz/#!4JxA3SqB!n9HfERX_VcLHWPaHpNzu6J7ddbCfYSnZgqC40RPEB_s

Edit: forgot to credit GDUB as I used his gold shade and Excel logo on the rims. <3
30
Suggestions and wishlist / Rider arms and legs
January 03, 2017, 10:58:02 PM
I have a question combined with a suggestion.

How is rider "rigidity" modeled? By rigidity, I mean mostly his arms and legs.

Watching replays and riding quite a lot, I notice that the rider is very, very rigid. He stays put most of the time, and when he moves, he tries to get back in position at lightning speed. I'm asuming the rider has a weight, and that the bike feels this weight and its position.

When riding SX, the whoops are a good example: the rider shakes around a lot while IRL, the torso of the rider barely moves. On steep / short jump faces, the rider will "tilt" with the bike, upsetting the balance. etc. A side effect is that the bike suspensions have to work twice as hard: while IRL the rider will "soak up" a good deal of a shock, virtually making himself lighter for the bike, it's not the case here. So bikes are bottoming out a lot (leading to other issues like bouncing, even on VERY hard settings).

In order to test this properly, would it be possible to have access in the next beta to some "rider settings"? Something along the lines of the fork settigns would be ideal - "spring" (or "strength"), bump and rebound. Maybe even for arms and legs separately. If not, could you try making his arms and legs more loose? Poor guy is cramping up 24/7.
31
Suggestions and wishlist / Vote: next track
December 29, 2016, 09:43:03 PM
Is it possible to implement a voting option to go to the next track in the server list? If the server only has 1 track, it just restarts the server. Would be nice and convenient, now that we have quite a few track.

Another option would be 2 commands, one to show the track list of the server, the other to vote for the server to load a particular track (Like Vote Winchester for example).
32
Setups / SX starter guide
September 10, 2016, 07:34:23 PM
Update to Beta5: Changes in bold.
TLDR: Suspension work better making SX behaviour more predictable, in particular rythm sections. Slightly better traction helps making big jumps. Slightly lighter front ends requires more tact to brake hard, and a better front end control in woops and on full throtle take off. Overall, SX difficulty went down slightly as it is easier to hit big rythms and be consistent, but harder to push it hard on hotlaps due to whoops and braking requirements. Difficulty order of my tracks: JS7 SX South < SX2016 Rd2 < SX2016 Rd1 < SX 2016 Rd3 < JS7 SXNorth. Expect lap times to be slightly slower than in Beta 4 (around 1s for a 1min lap).


Since I have seen people on youtube or online stuggling a bit with SX in general, I just wanted to contribute with a quick guide on how to get started in SX in MXB. Of course, it is subjective as to what to do and why, but what follows has been how I could make it work for me.

Before the actual guide, a few words of infinite wisdom ( ;D ).

In MXB, and at least on the tracks I have made, SX is a matter of finding the flow of the track. If you try to approach each section trying to "make it", basically, you won't. You will always be faster doubling through nicely than forcing a triple in nose high that you'll case. Hoh, and you'll have more fun too.

In order to achieve that, you need to be smooth with the bike. Which requires you to know what the bike is doing and how the physics work. The big NONO currently (beta 5) is having the bike center of gravity moving around too quickly - inertia WILL throw you off. That includes changing the bike lean on a jump / bump (unless you know what you are doing and you are scrubbing / whipping but this is a starter guide). You will be able to jump smoothly even if the bike is leaned, as long as the angle doesn't change. Also, you will wash the front end and/or back end out if you give too much gas on a berm. This is realistic, but can be surprising in a game. The way I have found to control this better comes in three steps:

1. Know what your bike and rider are doing

1.a. Camera
I am extremely uncomfortable running in the 1st person bike view because I have no idea how my rider is positioned and how the bike is moving around him. Same in 3rd person as I lack the perspective. I have found the 1st person chest mount to be best for it, with the following settings:

In Settings / Simulation: FoV 110, Tilt 50%, Pitch 30%, no corner anticipation.

This allows me to always have at least the front fender moving around in sight, and estimate the lean of the bike without getting dizzy because of too much movement.

1.b. Controls
Set up everything to your taste binding-wise, but in terms of control you want to dampen your input slightly, and make sure you control the lean of the bike perfectly. There are two schools for that: either stick = lean angle, or stick = movement. I belong to the first school (this is the Direct Lean option). You also want stability help. It's not "cheating", as the devs confirmed it was for testing purposes but intended to be put at 100 or close to it at all times. I see it as "hours spent in the gym in the off season". The higher the Stability Help, the more your input will have effect on the bike. In Beta 5 you can get away with lower Stability Help settings (down to 60% or so), making you turn sharper but have a harder time in the whoops. I currently run mine at 70% but do not recommend it when starting out.

In Settings / Simulation: Stability help 90% ; in Settings / Input: Direct lean 90%. 0 riding helps (beside automatic tire changes, I'm too lazy). I have found out that Automatic Rider F/B Lean is overridden when you give Rider F/B Lean input, but kicks in when you dont. Up to you if you want that, it can help when starting out but don't get bad habits - you'll need it off at some point.

Do not overlook the controller settings. They are very powerful and can drastically change your experience from "I barely touched the stick what the hell" to "wow this is not even responding". I run with somewhat of a mellow setting to allow me to be more stable when approaching jumps and berms, at the cost of turning a tad slowly.

In Settings / Input:
- Lean : 100% Linearity ; 0-0% Smooth ; 100% Gain
- Throttle: 100L 30-10S 100G
- Brake: 75L 50-25S 100G
- Rear Brake: 100L 100-100S 75G
- Rider F/B: 100L 0S 100G
- Rider L/R: 100L 0S 100G
Beta 5 changes rundown: trying to diminish the spinnind/washing out by replicating the natural smoothing that comes with real bikes commands, in particular how disk brakes work.

Deadzone to taste according to your controller quality... Do NOT overlook this. Beta 5 made the bike more responsive in general. In the whoops in particular, any unwanted input can result in swapping out. Your goal is to set your deadzone at a level which does NOT give any input when fiddling around with your finger on the controls. Do not worry if you hit 20% or so, it's normal on a worn cout controler and will not impact when you actuall give an command input.

2. Bike and bike setup

Everyone has a favorite brand, I know. Every single bike can run SX properly (125KX, 450YZF, whatever). Save yourself some frustration, get on the MSM 250F or the YZF 250F. Those two are the most neutral and balanced, the MSM being soft, the YZF being rigid. The 450F are overpowering at first (heck, even now). The 250 2 stroke require you to already flow or they will bog down / throw you off. The 125 2 strokes are like 250 2 strokes without the power ;)

The first things you should do are:
- Changing the gear ratio to 13/52 (in the pits, Drivetrain)
- Changing the tires to Med Soft (in the pits as well).

You do not need to touch the suspension for now. Both of those bikes run great stock. Maybe put a harder spring on the MSM forks and shock if you feel it rebounds too much.

Suspension setup tips
Start off by reading the Suspensions Tutorial by StoneRider. This will help you achieve a base setup that you will need to tweak for SX. I usually proceed with those steps once I have around recommended sag values:

    • Fill up the oil in the fork to 130.
    • Get the rear a bit soft with slow rebound (lower bump / higher rebound values). This helps traction and whoops control.
    • Get the front a bit harder to move (higher bump and rebound) but decrease it's preload bit a few clicks.
    • Ride a lot and see how it behaves.[/b]

    A few pointers:
    - bottoming out the rear shock throws you sideways in the air.
    - bottoming out the front throws you nose high uncontrollably when jumping hard.
    - whoops is a matter of a softer rear with a stiffer front.
    - jumping slightly nose high constantly can be lessened by going down one spring rate (fixing your preload afterwards of course).
    - it's not too bad bottoming out the rear on jumps slightly as long as you retain traction and whoops stability. Bottoming the front is a no no.


    3. Track riding general tips

    I would strongly suggest you start with either the SX South (clay) of the JS7 compound made by TheFatController and me or the Factory SX training facility made by Pacopastor. Both tracks are the most forgiving SX tracks I know of.

    Once again, try to find your flow and don't force it. This is the most crucial aspect of SX.

    Couple of tips I learned the hard way:

    - whoops should be approached by shifting one gear up (if you are coming in in 2nd, shift up to third) in neutral position. Let the bike settle down into the first 2 whoops with very low throttle, start leaning back, then put around mid throttle. Hitting the rev limiter is a sign you have too much throttle. Get in straight as an arrow, do not try to change direction other than using rider lean (if even). Let go of your lean stick.
    - berms are not a launching pad. You should be braking coming in, and accelerating slowly until you are straight up again.
    - engine braking is huge on the 4 strokes. Throttle control while landing and taking of is the key to flow the rythm sections. Rule of thumb: never have 0% throttle taking off and landing. Wide open will also shoot your front end high. Use Rider F/B lean to compensate.
    - don't try to straighten up the bike last minute on obstacle faces. You'll be smoother taking off with a small but stable angle.
    - yes, you can seat bounce. No, you should not need it anywhere on those two tracks.
    - if you find yourself nose or end high too often, try to look at your replays to see if you are bottoming out.
    - slightly moving forward on big jumps take-off helps the bike move naturally nose down toward the landing.
    - slightly moving backwards at the end of the tables helps the bike jump further to the next obstacle.
    - at least on SXSouth of the JS7 compound, taking the outside lines and doubling in is very easy and not a big time loss at all (except the northern set of whoops, take the left turn then roll the first bump taking the outside line, the double is tricky, as is the inside line).
    - with a light front end, be very careful when grabbing the front brake and trying to turn right away. You WILL wash out. In particular when the front suspension is working it's way back up (typically 1 or 2 seconds after coming out of an obstacle like jumps or whoops). Either let engine braking do its job and stabilize the bike, or brake as you land. For this reason,  SLOW DOWN at the end of a whoops section if a turn is coming up. Don't expect to get out of the whoops and slam the brakes, it won't work.


    Now, get on the tracks and practice. You'll most likely change the settigns around a bit to suit your taste and style. After a bit, you will feel like you need to change the bike setup. Or try new bikes. Or whatever. At that stage anyhow, this guide will be too basic for you ;)


    As a reference point, using exactly those settings, and NEVER touching Rider FB/LR lean on a stock MSM250F, I can run SXSouth on the fast lines (tripling in) around 52s laptime consistently.
    33
    General Discussion / JS7 Practice session - Sept 11th.
    September 10, 2016, 01:30:50 PM
    Heya.

    Wanted to organize as a bit of an incentive to all play together an online session tomorrow (so Sunday September 11th) at
    - 9pm CEST (Berlin, D)
    - 8pm BST (London, UK)
    - 3pm EDT (New York, USA)
    - Noon PDT (San Fransisco, USA).

    Hopefully I didn't mix up the time zones ;)

    It will be held on the GTX 2 server running the JS7 Practice track.

    IMPORTANT: You need the track from HERE and the bike pack from HERE. Skin packs are optional, but if you want to see me and TFC in all our glory you will need the CRF HRC bike skins and the FOX packs 1 and 2.

    TFC and I will be there. If some of you want to, I don't mind "coaching" a bit on the SX tracks so you figure those out faster.

    Hope to see you there!
    34
    Bug Reports / TrackEd camera bug
    September 07, 2016, 03:44:42 PM
    Latest version of TrackEd (1.20).

    It seems the Arc cameras appear correct in Track Ed (X/Y/Z, movement) but in game the Z direction seems reversed. There might be a sneaky "-" showing up somewhere during saving / exporting / importing.
    35
    General Discussion / Soon...
    September 06, 2016, 10:19:20 PM
    https://www.youtube.com/v/5hBWErntuZ4&

    TFC and Asdrael.
    36
    I'm currently experimenting with a rather complex track (5 material layers, 10 texture layers, 4097 heightmap and 2049 texture masks). My PC can handle it fine but it makes the game crash more frequently than usual. It appears to be linked to deformation (I have run more than 20 laps with the deformation on.). I am crashing often when trying to trigger the replay, and when reseting the track deformation in game I have to wait a lot (several minutes) for it to do anything. Once I get a fresh track and go, I crash half a lap in.

    Is there any bug report generated I should send?

    - Edit: it's not even a crash with an error message, it is straight out kicking me out of the game. Also, when I go back in after a "failed" track reset attempt, the track is back to its rutted version.

    - Edit 2: "fixed" by hitting track reset, going for a walk, then going back to menus to reload the track.
    37
    Paints / CRF HRC 2015
    August 10, 2016, 06:37:52 PM
    Well, since I recently fell in love with the behaviour of the CRF 250 (but not so much with the looks, as usual with Honda for me) and I saw this:


    Well, I made this:


    It's 90% accurate, I had a good model to do it in form of a sticker kit. It is the 2015 HRC paint, which I find much nicer than the 2016.

    The folder also contains my skin (Asdrael #15) and TheFatControler skin (#1, tha winnaaarr).

    Enjoy!

    Download on MXBC

    (Known issue: slight clipping on the front brake disk protection that comes with the original model.)
    38
    Races / Suggestion to server hosts.
    July 09, 2016, 06:06:02 PM
    Hey,

    First of all, thanks a lot to the people hosting servers.

    That being said, and since we have had quite a few tracks popping up, and a limited amount of servers, some never see use and I find it a bit sad (track maker viewpoint) and frustrating (rider viewpoint).

    I would like to suggest to have track rotations on server now so we can enjoy different tracks in the same online session. I'm hoping it would encourage people to discover more tracks, while keeping an incentive high for people to play online.

    I am not sure how to do it, but maybe we can go with:
    - Stock, using only stock tracks.
    - MX, using the National / MX tracks
    - SX, using the SX tracks.

    With maybe faster rotations and 2 moto, akin to what MXS is doing (10 min practice + 2x5 or 10 laps race depending on the lap duration).

    Thoughts?
    39
    Suggestions and wishlist / TrackEd - SX standpoint
    July 04, 2016, 12:21:12 AM
    Hey.

    I just thought I'd give my 2cp on TrackEd after using it quite a bit to make my SX tracks and how it turns out in game. Most of what I am saying comes from how narrow, short we have to make the tracks - and how close the lanes are.

    I'm by no means a god on TrackEd so if any of my concerns have a solution, please let me know.

    Centerline and resets

    The way the resets work, as far as I understand, is that you repop on the closest centerline spot. Which induces:
    1. potential cross-lane resets
    2. repop in the middle of the lane (this is where you HAVE to place your centerline, otherwise you'll have tons of cross-lane resets). With collisions on, erm...
    3. a crapton of waiting: 22 riders on a 1 minute (900m track). If you fall on a full grid, you might never get back on.
    4. almost impossible to have over unders.

    I would really like, in order to make it fully raceable:
    - Being able to force "last successful checkpoint reset". If you fall, you repop on your last succesfully passed checkpoint. This would get rid of 99% of 1. and 4. Possibly a checkbox in the checkpoint setting?
    - Being able to redefine the location of the repop. For example by creating a secondary centerline that is used only for repops (on the side), interacting with my first suggestion too. This would take care of 2., a bit of 3. as well.
    - Being able to define the safe distance for a repop. It currently is way too big for SX. This would take care of 3. for sure.

    Marchals

    - Being able to define which section of the centerline they are supposed to watch. I'm getting cross-flags on SX tracks and I haven't found a fix. In their edit box, they could have a "Long. Start, Long. End" values (optional, or defaulted to flag location +- 100).

    Cameras

    - Being able to have the effect of their limits when you use "Test".
    - As with marshals, being able to set which part of the track the cameras are designed to watch.

    Pits and Grids are very flexible and easy to configure, so good job on that :)
    40
    Tracks / SX2016 Round 3: Anaheim 2
    July 03, 2016, 12:57:58 PM
    SX2016 Round 03: Anaheim 2

    Continuing with the replica (1.1:1 scale) SX of the 2016 season for my third track, here is...


    I have documented the making of this track HERE.

    Now this round was a bit special. I wanted to push the limits of what I was capable of doing in terms of SX, and what the game could take in its beta 4 stage. Overall, it is easier to be average this round, similarly difficult to previous rounds to be fast, but there are some wicked hard and fast lines. If you "see" a section, it is probably doable. But... can YOU do it?

    I tried replicating the actual track and blueprint as well as possible, while making a fun track with a lot of options. Not the one lined hell that was raced (take a look at this go pro of the event if you want to know what hell is like). I improvised in the turn after the finish line to keep it interesting and fun. And yes, beside the quad over the table, all his lines are doable.

    Compared to previous rounds:
    • jump faces and landings  are very slightly steeper
    • whoops should be more forgiving, with a bigger range of minimal to maximal speed
    • rythm section start earlier exiting turns, finish later coming into turns. Being smooth and in control  will be more rewarding than charging WFO like a madman
    • "introduced" the double wheel tap as a way to go over certain obstacles
    • some sections can only be done with proper body movement. Yes, I went there.
    Download SX2016RD03 on MEGA.NZ

    Download SX2016RD03 on MXB CENTRAL

    I hope you guys will enjoy this track! This will most likely be my last one until beta 5 comes out, as I will not be able (nor really willing) to devote the time it takes to make this kind of difficult track ridable and somewhat enjoyable in the near future. It just takes too much time messing around with the obstacles because the rider/bike cannot compensate a bit of spacing/shaping imperfections.

    Hoh and yeah, feedback welcome ;)