Hi.
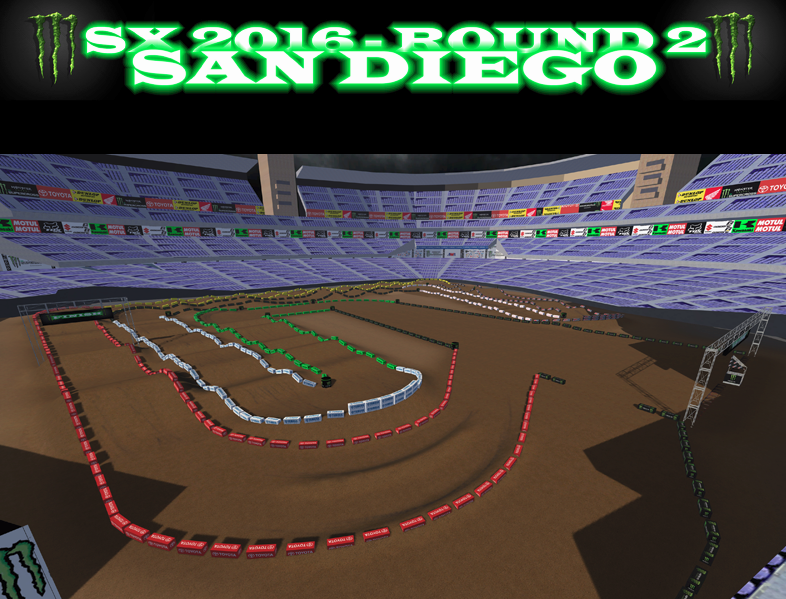
I decided to document roughly how I am approaching replica SX building in MXBikes, figuring it might help people trying to do it or willing to do it. Feel free to ask questions and give input. I will be using Anaheim 2, 2016 season, as an example. The clear goal here is to encourage people to start trying it out. It's not hard, and quite frankly, I don't think I will do all tracks of the season. At least not alone.
Disclaimer: This is not meant to replace the existing track building tutorial but rather highlight the specifics of replica, SX, and my approach in general. So I will NOT go to the basics of how to setup your folder, etc. I will be using Photoshop and Sketchup for track building, and Blender + L3DT for format conversion. I strongly recommend the stickied guides at the top of this forum if you want to start looking into creating content - this is a specialization guide for replica SX!
Step 1: Documentation and decisions.
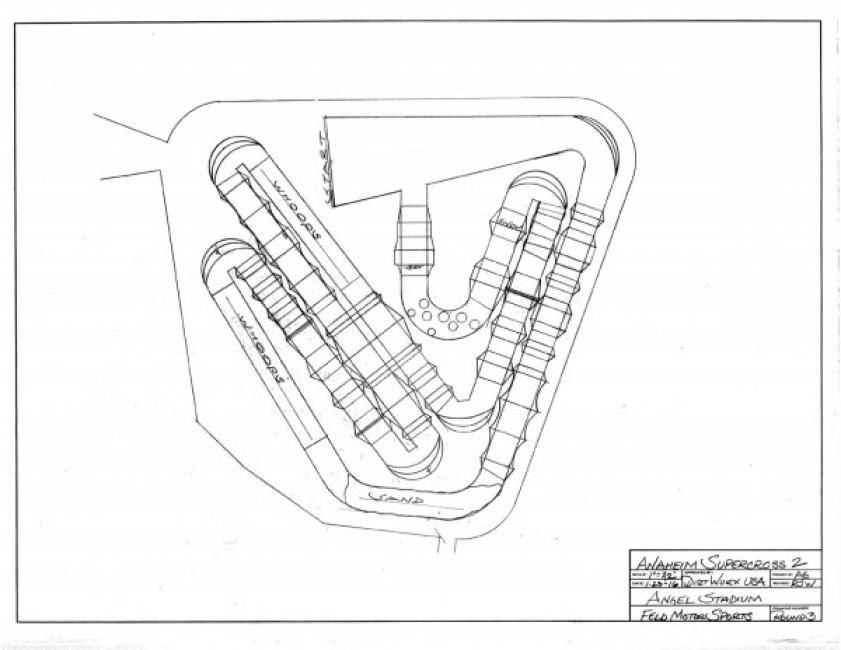
Obviously, to make a replica, you need proper documentation. Track maps can be found either in blueprint format on racerxonline, as well as static 3D rendering on supercrosslive. Different websites have animated trackmaps which are quite frankly shitty.
Now, you will notice that blueprints sometimes differ from 3D renderings, and both differ from the actual track that was raced. YouTube has both races and GoPro's of the official event which gives a decent input on obstacle size (2, 3, 4, 5, 6' tall is the important bit) and line choices.
At this stage, I normally print a large blueprint of the track I'm making - this time A2 2016 - and write on it the changes, rhythm sequences and any important ruts that have been either prevalent for trajectories or "semi built in". This gives me a backbone on which I can build.
Sometimes, and this is the case with A2, you will notice a track turned out shitty. A2 was hell, with whoops that most of the pack couldn't skim, landings way too steep for comfort, spacing out of whack. This made the track extremely punishing and it didn't look fun at all, while the blueprint gave hope for a nice track with a lot of air time with different line choices. This is where you need to draw the line between realism and fun.
This time, I will be following blueprint more than GoPro footage hoping to nail the "flying" aspect of the track. As last time, I will see the sand section as my own playground and try to make something fun and personal out of it. Keeping a 1.1:1 scaling (using 220x220x3.5m on a 2049x2049px tile in the configuration file if anyone cares).
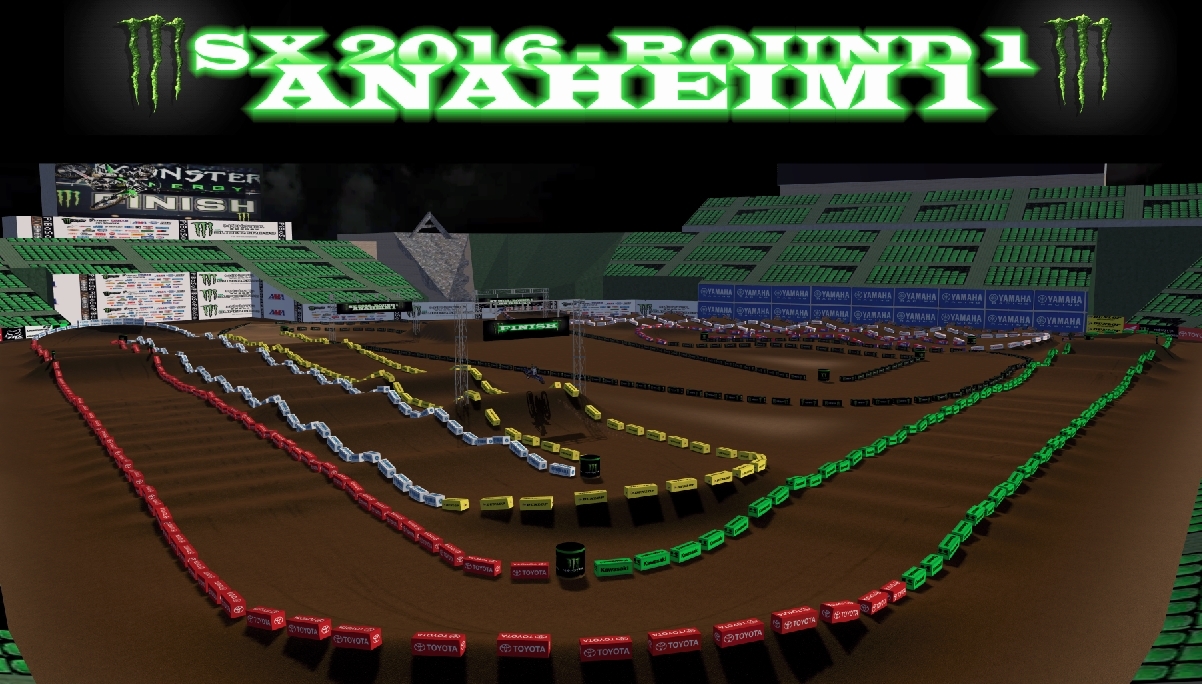
Here we go.
Step 2: Porting in your layout and making the track.
Step 3: Working comfortably: the track in progress loop.
Step 4: Building a rhythm section as per (modified) blueprint.
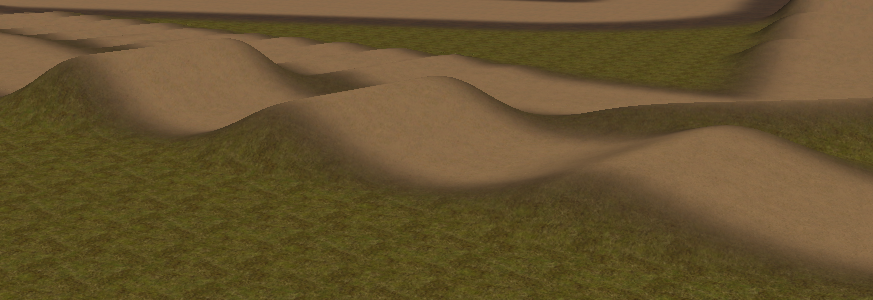
Step 5: Advanced obstacles and sand sections.
Step 6: Berms and their placement.
Step 7: Whoops.
Step 8: Turning an obstacle course into a racing track.
Step 9: Non-collidable objects placement.
Step 10: Tuff block placement and alignemnt.
Step 11: Textures and shadowing.
Step 12: Final TrackEd files and preparing release.
Actual release topic of the track
I decided to document roughly how I am approaching replica SX building in MXBikes, figuring it might help people trying to do it or willing to do it. Feel free to ask questions and give input. I will be using Anaheim 2, 2016 season, as an example. The clear goal here is to encourage people to start trying it out. It's not hard, and quite frankly, I don't think I will do all tracks of the season. At least not alone.
Disclaimer: This is not meant to replace the existing track building tutorial but rather highlight the specifics of replica, SX, and my approach in general. So I will NOT go to the basics of how to setup your folder, etc. I will be using Photoshop and Sketchup for track building, and Blender + L3DT for format conversion. I strongly recommend the stickied guides at the top of this forum if you want to start looking into creating content - this is a specialization guide for replica SX!
Step 1: Documentation and decisions.
Obviously, to make a replica, you need proper documentation. Track maps can be found either in blueprint format on racerxonline, as well as static 3D rendering on supercrosslive. Different websites have animated trackmaps which are quite frankly shitty.
Now, you will notice that blueprints sometimes differ from 3D renderings, and both differ from the actual track that was raced. YouTube has both races and GoPro's of the official event which gives a decent input on obstacle size (2, 3, 4, 5, 6' tall is the important bit) and line choices.
At this stage, I normally print a large blueprint of the track I'm making - this time A2 2016 - and write on it the changes, rhythm sequences and any important ruts that have been either prevalent for trajectories or "semi built in". This gives me a backbone on which I can build.
Sometimes, and this is the case with A2, you will notice a track turned out shitty. A2 was hell, with whoops that most of the pack couldn't skim, landings way too steep for comfort, spacing out of whack. This made the track extremely punishing and it didn't look fun at all, while the blueprint gave hope for a nice track with a lot of air time with different line choices. This is where you need to draw the line between realism and fun.
This time, I will be following blueprint more than GoPro footage hoping to nail the "flying" aspect of the track. As last time, I will see the sand section as my own playground and try to make something fun and personal out of it. Keeping a 1.1:1 scaling (using 220x220x3.5m on a 2049x2049px tile in the configuration file if anyone cares).
Here we go.
Step 2: Porting in your layout and making the track.
Step 3: Working comfortably: the track in progress loop.
Step 4: Building a rhythm section as per (modified) blueprint.
Step 5: Advanced obstacles and sand sections.
Step 6: Berms and their placement.
Step 7: Whoops.
Step 8: Turning an obstacle course into a racing track.
Step 9: Non-collidable objects placement.
Step 10: Tuff block placement and alignemnt.
Step 11: Textures and shadowing.
Step 12: Final TrackEd files and preparing release.
Actual release topic of the track
 ).
).