• Welcome to MX Bikes Official Forum. Please login or sign up.
 
April 25, 2024, 10:26:55 PM

News:

MX Bikes beta18j available! :)


Show posts

This section allows you to view all posts made by this member. Note that you can only see posts made in areas you currently have access to.

Messages - Asdrael

1051
Tracks / Re: SX2016 Round 3: Anaheim 2
July 03, 2016, 09:37:10 PM
Quote from: TheFatController on July 03, 2016, 09:31:10 PM
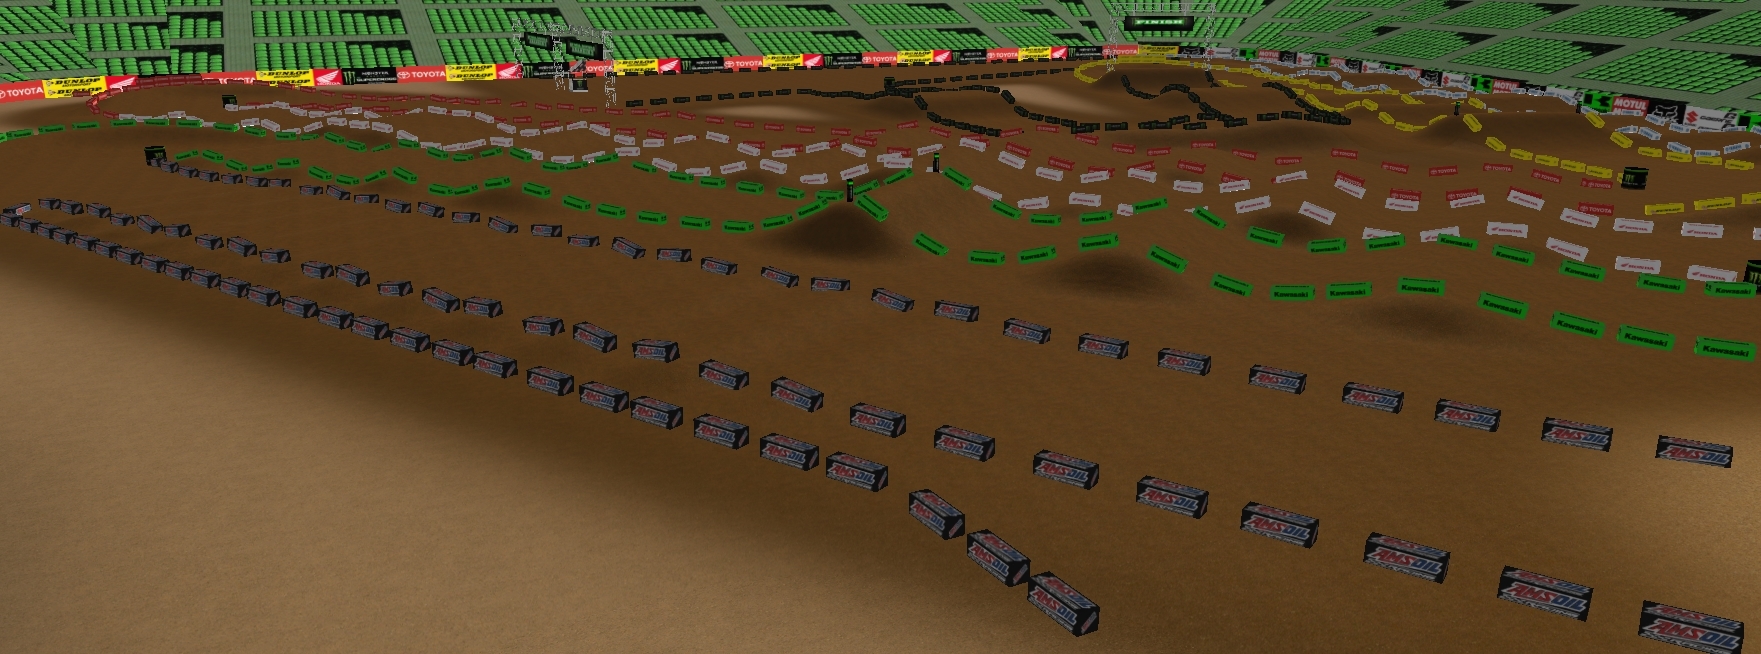
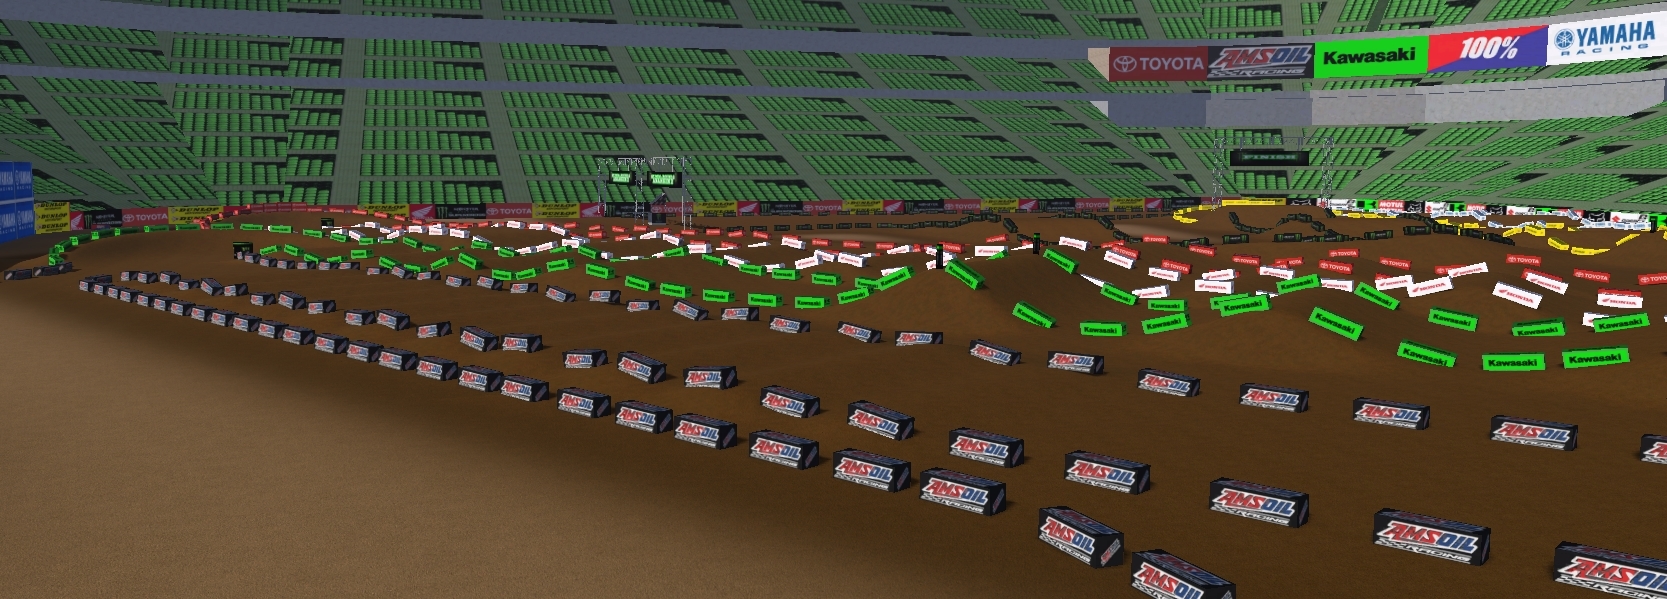
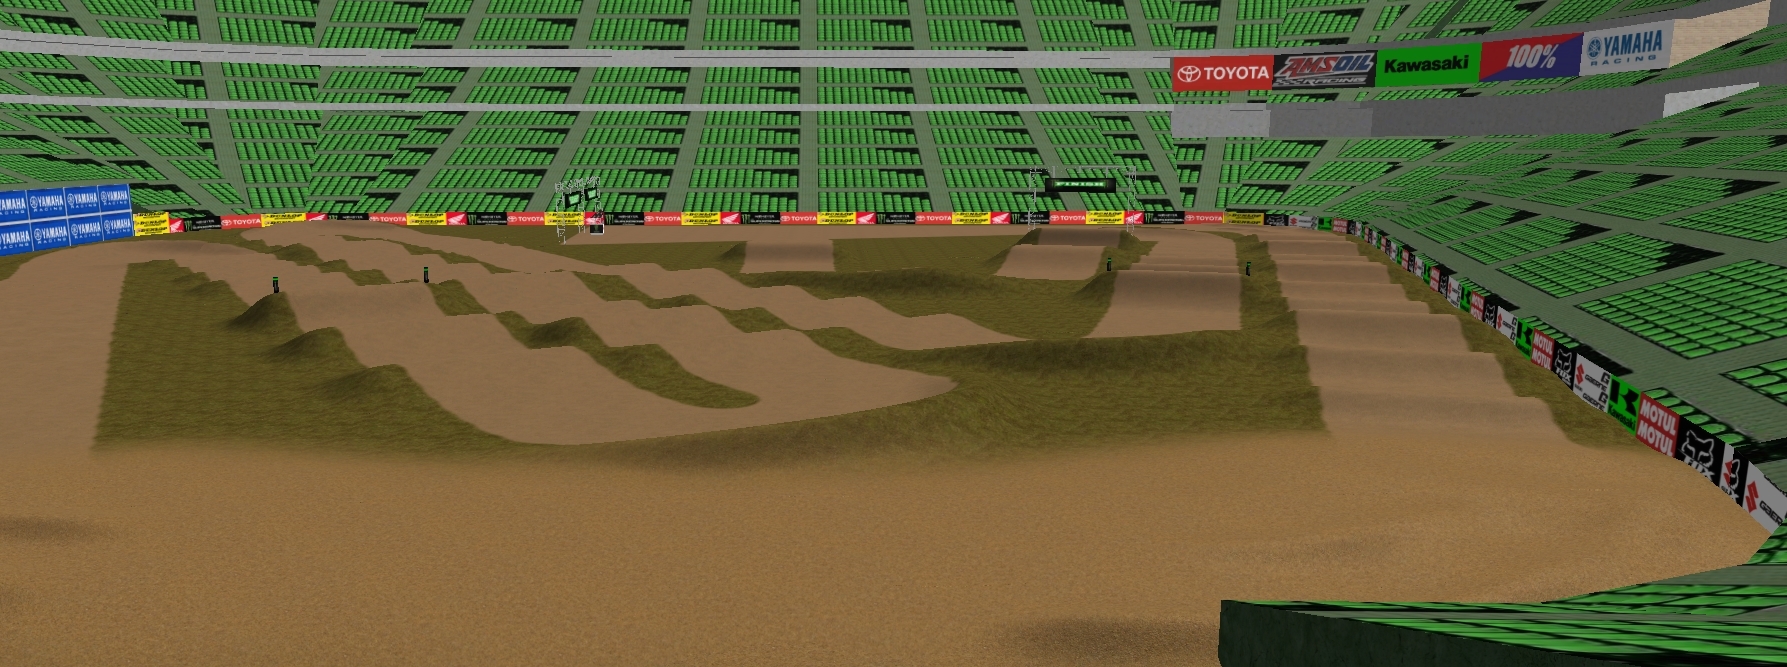
Yes, compact is I think the grippiest but there was some kind of mix up with surface types, there's a thread somewhere around..

Soft soil I've found is the best but if it changes next beta then the tracks will be unrideable lol.. Soil is probably a good compromise!

To be more precise, compact soil seems more grippy bit a bit but as soon as you lose traction, you are going down (in my experience). Regular soil is more controlable. I didn't want soft soil because of the monster particle effects.
1052
Tracks / Re: SX2016 Round 3: Anaheim 2
July 03, 2016, 09:29:10 PM
Regular soil. I found it to be more "controlable" than the compact soil.

Actual file:
material_layer0
{
material = compact soil
}
material_layer1
{
material = soil
thickness = 0.1
}
material_layer2
{
material = sand
mask = sand_mask.tga
thickness = 0.5
}


With this parameters, it should (and looks to) be what I found to be the best traction for SX (warning: opinions may vary) at all times with deformation off, and dig just enough for it to be slightly felt with deformations on.
1053
Tracks / Re: SX2016 Round 3: Anaheim 2
July 03, 2016, 08:53:28 PM
Glad you guys are enjoying it.

It does seem slick for some reason, even though I used exactly the same parameters as round 1 (A1) for the surfaces. I don't know why.
1054
Track Editing / Re: Building a replica SX - A2 2016
July 03, 2016, 12:59:09 PM
Thanks for the kind feedback! Track released HERE.
1055
Tracks / SX2016 Round 3: Anaheim 2
July 03, 2016, 12:57:58 PM
SX2016 Round 03: Anaheim 2

Continuing with the replica (1.1:1 scale) SX of the 2016 season for my third track, here is...


I have documented the making of this track HERE.

Now this round was a bit special. I wanted to push the limits of what I was capable of doing in terms of SX, and what the game could take in its beta 4 stage. Overall, it is easier to be average this round, similarly difficult to previous rounds to be fast, but there are some wicked hard and fast lines. If you "see" a section, it is probably doable. But... can YOU do it?

I tried replicating the actual track and blueprint as well as possible, while making a fun track with a lot of options. Not the one lined hell that was raced (take a look at this go pro of the event if you want to know what hell is like). I improvised in the turn after the finish line to keep it interesting and fun. And yes, beside the quad over the table, all his lines are doable.

Compared to previous rounds:
  • jump faces and landings  are very slightly steeper
  • whoops should be more forgiving, with a bigger range of minimal to maximal speed
  • rythm section start earlier exiting turns, finish later coming into turns. Being smooth and in control  will be more rewarding than charging WFO like a madman
  • "introduced" the double wheel tap as a way to go over certain obstacles
  • some sections can only be done with proper body movement. Yes, I went there.
Download SX2016RD03 on MEGA.NZ

Download SX2016RD03 on MXB CENTRAL

I hope you guys will enjoy this track! This will most likely be my last one until beta 5 comes out, as I will not be able (nor really willing) to devote the time it takes to make this kind of difficult track ridable and somewhat enjoyable in the near future. It just takes too much time messing around with the obstacles because the rider/bike cannot compensate a bit of spacing/shaping imperfections.

Hoh and yeah, feedback welcome ;)
1056
Track Editing / Re: Building a replica SX - A2 2016
July 03, 2016, 11:45:01 AM
This "how to - my way to do a replica (SX) track" is now finished. I hope you guys are now more motivated to try something similar.

As usual, I welcome any feedback and questions. I know for sure I am not doing things optimally - this is only my 3rd track ever - but I feel my process allows me to come up with realistic, doable yet challenging, fun tracks that can be raced on in a reasonable time frame for the current state of the game.

Special thanks to TheFatControler and geofanatec for their tutorials and help that got me started.
1057
Track Editing / Re: Building a replica SX - A2 2016
July 03, 2016, 11:41:38 AM
Step 12: Final TrackEd files and preparing release

Now that my actual track files are ready and that it looks and rides good in game, I just have to make sure that all the data attached to the track is correct, usable when racing (grid, pits, finish line, checkpoints, marshalls) and fun (replay cameras).

I always keep this for the last steps as having the tuff blocks here helps a lot when making the width of TrackEd checks.

TrackEd

Centerline
My initial centerline was good on most of the track as testing with tuffblocks collision on did not allow for cross track resets. Reloading it at this stage however highlighted a small issue in the sand section where people might repop on top of the blocks which is not really fun. I just have to adjust that, keeping everything else centered as well as possible.
You might notice that I always use 2 sections for the 180° turns. This is because TrackEd caps turns at 180° and it is very tricky to make two parallel lines with only 1 curved section in between.

Race data
I have to split my grid because I am using a starting booth in the middle, and I have to make sure my pits are correctly places as to not collide with the objects and offer enough room for people to move around. Not too difficult. I tried to have 1 checkpoint every important section, usually in the middle of turns.

Good luck cutting!


Marshals

Those are more or less placed at the checkpoints positions. I try to have the warnings before significant sections parts to allow riders the time to actually react. Tedious to do, but not difficult.

Cameras

Yay, fun part! I usually run with typical camera settings, eventhough it is difficult to make it smooth in SX because the lanes are so close to each other - the cameras often switch too fast, even whgen you are not in the "intended" lane. You can fix that in teh settings but it is very very difficult to estimate where and how stuff should cut. If only it would apply the limit settings in the editor... ;)
- Fixed start camera for the gate drop.
- Stadium seats randomly picked
- Pit cam, fixed
- Sky cam, fixed
- Corner (Monster cans) cams
- A fix cams with a pathing for rythm sections, whoops and some nifty turns.

Track map and image
And now for the finishing touches, I'm going to need 1. a track map and 2. a track image, in the continuation of the previous ones since it is a series.

Track Map
Well, I have my layout, my obstacles... why bother! Show all!


And for the track image, which I am going to use for track selection in game and track presentation for the release, I am going to use the same format as before and try to find a nice angle for a high resolution in game image, using the cameras that I set up before while I do final testing.

Once this is done, I will rename all my files to the final name, upload the track, do a wall-of-text release topic, register the track, and hope you guys have fun with it!
1058
Track Editing / Re: Building a replica SX - A2 2016
July 03, 2016, 10:30:44 AM
Finishing the placement of objects, I exported and loaded up everything in mapview to make sure everything looked fine. I simply run a "camera lap" left side and one right side to verify that I have no flying blocks. Since everything looked fine, I could move on to texturing my track.

Step 11: Textures and shadowing.
Those two different actions serve the same goals: make your track realistic looking as well as highlighting obstacles. Since we are currently running an MXB version with only 1 light emmitor option, I am careful that it works out decently well and people do not get surprised by bumps.

Making a new texture
  • Find a texture I like that is seamless or modify a stock texture to the shade I want. Hint: tiling your texture will make it brighter if it's bright and darker if it's dark. Take your time!
  • create the norm.
  • Flip fast between my different textures to check that I don't have any big shade differences. I usually go for a few shades darker for the underlayer that is revealed when ruts are formed compared to the top layer.
In the case of supercross, I want 5 different textures:
- Base: the base layer, which can be concrete stadium floor or grass.
- Mud: my underlayer for my ruts, for which I use the base mud layer.
- Dirt: a "dry dirt" layer, for the borders of the track. I use the regular dirt texture.
- Track: a "wet layer" which is the prepared track. I use the regular dirt texture that I have darkened.
- Sand: a sand teture which I have found online and tweaked to make it look like sand. It is a bit brighter than actual sand on SX tracks but it gives contrast that is easy for the eyes.

Making texture masks
Now i need 4 texture masks, as my Base requires no masks. I prepare them going back to my PSD file. I find it easier to work (with a twist) from top to bottom in that case. And I always rename my PSD file to avoid the reflex ctrl-s ruining my previous days of work!
- Sand_mask: it is the easiest: I just use my sand section base layer that I bump to 100% opacity.


- Track_mask: I take my track and start layout that I broaden (50 px) and apply a gaussian filter (25 px) to.


-Mud_maskFor this one, I just free-hand draw around my track, and apply a 25 px gaussian filter. What, did you expect anything fancy? It's just a truck dropping dirt...


-Dirt_mask = mud_mask - (minus) track_mask. That's it.


Time to compile using map.bat to check it out - carefully not forgetting to update my .hmf file!


Welp, that's an SX track. A bit of the concrete is showing in the pits, which isn't too bad. I don't mind that. The obvious problem now is that jumps blend into each other, and the objects seem "dumped" on the track. This is solved by running shadows.

Shadows.

At this stage, there are two different stages that add shadows to your track. The first one is in params.ini before rendering the track and adds object shadows. The second one is in the track file and is the .amb file which adds shadows to the rest of the polygons during play (bikes + track).

Careful: it seems that the main light source settings do not actually represent where the light source is located on the map, but rather in relation to the object!

params.ini
At the very begining I removed shadows from the params.ini file to increase the rendering speed. Time to put it back on. I use only the stock settings, except for the light source position. This is really a matter of experimentation. As I am doing a replica SX I will put the light source roughly where the main light source of the stadium was in real life, which I then put two times higher than what it should be to keep shadows on my bumps and objects in a meaningful way while avoiding big dark areas that make people ride as if it was night.

Running the map.bat (for quite a bit of time now), and opening it up in mapview, it does look better now.

track.amb
Well, I copy paste my value for the X and Z position of the light source use half of the Y value roughly. I do not touch the rest.

And now, using mapview, it looks better.


Disclaimer: the shadows in game look always a bit more drastic when everything is moving around.


Now that my actual track is ready, I will move on to the finishing touching: creating proper marshalls, checkpoints, cameras, and eyecandy for the track release.
1059
General Discussion / Re: Riding Crossed Up!
July 02, 2016, 03:11:43 PM
Leaning more than the bike is used very rarely in MX, at least not for a whole turn. You can use your body to try to pivot the bike faster but no way you'll be doing that the whole turn. You'd wash out.

Typically you turn with your "inside butt-cheek" on the seat, which is the opposite of road-bike turns where you have your outside butt-cheek on the seat.

Villopotto training on SX turns:
https://www.youtube.com/watch?v=gDNd8Uw16lQ

He is getting like 10-15° less angle than his bike on a perfectly groomed bowl turn, on which you can gauge the adherence fairly well and push it. There is even more angle difference in a MX rut.
1060
Track Editing / Re: Building a replica SX - A2 2016
June 29, 2016, 01:35:15 AM
Step 10: Tuff blocks and alignment
Corner monster can
I always put a bigger round can in my corners so it's easier to spot from afar and aim for it, plus it gives me a landmark for cameras. I just put them on the 2D layout, and check the height with the 3D mesh.
Block alignment in straights and rythms.
  • Use the 2D layout
  • Draw a line in Sketchup alongside the track lines
  • Align blocks on it
  • Unhide the 3D mesh and check alignment - adjust as necessary
  • Raise in the Z axis the blocks
  • use the Smart drop extension of sketchup on the 3D mesh
  • Check discrepancies and adjst.
Which bring me quite easily from this:


To this:


now I have to do it all round the track. The golden rule for tuffblocks is "better too low than too high".


When it comes to turns, it is very similar but with a twist.
Blocks in turns
  • Draw a curve on the 2D layout and proceed exactly like with the line
  • Use the extension DropGC instead of SmartDrop so only the Z axis drops!
  • Adjust based on the mesh as needed.
  • Double up on top of the fast 180 berms to avoid people catapulting
And it goes from this:


To this:


And going on and on around the track now...
1061
Track Editing / Re: Building a replica SX - A2 2016
June 28, 2016, 01:41:08 PM
Step 9: Non collidable-objects placement.

If I want to be efficient in placing my object, I need to prepare well my work and plan ahead, so I just have to drag and drop afterwards. The way I like to do things is to have a 2D "background" that will guide my rough X-Y placement, and a neutral 3D mesh to enable Z and rotation placement well enough without overloading my computer.

2D layout map

Open TrackEd, load my .trh, take a screenshot using texture representation with narrow masks (the one I created right at the start). Done!


3D mesh

I use L3DT to turn my heightmap in a 3D mesh. With a supercross track, I want to export an optimized mesh (in .3ds to import smoothly in Sketchup) with around 25k vertices. This is a good compromise to work fast without having my computer bog down (if I remove shadows) and remain very accurate in Z and surfaces. The X/Y/Z scaling is important at that stage, you want accurate ratios or your object will be flying/sinking.

Sketchup preparation and scaling.

Now the big challenge is to scale properly my Sketchup project so everything lines up. I use a reference block in a corner that I line up with the layout and mesh, and then export and check in mapview how well it is aligned. Trial and error. It is crucial to do it well otherwise all objects will be wonky. Regarding the Z scaling, I add a 100% white pillar in my heightmap before creating the mesh to make sure nothing funky happens.

And now I have 1 black block, my 2D texture layout and my 3D mesh all perfectly aligned:


I of course added a scene in my .hmf and .tht files before running map.bat again.

scene0
{
name = REF.edf
pos
{
x = 0
y = 0
z = 0
}
rot
{
x = 0
y = 0
z = 0
}
}

And in Mapview:


That will be sufficient!

When doing a replica SX, I want 1. a stadium, 2. tuffblocks, 3. extra scenery like finish / gate arches and 4. a ton of advertisement (whihc is texturing of the other 3 elements). I normally work with 3 sketchup files and 3 scenes to avoid overloading my computer and remain with reasonable file sizes. From now on, it's more creative than strict though.

Stadium]
I have the stadium from A1 (adapted from the Sketchup Warehouse) that I am going to reuse. Easiest object ever, I will just copy paste it. Just a few slight changes need to be done in Sketchup (alignement mostly), and I can export it. It is going to be its own scene without collision. I just have to be careful and check in Mapview that there is enough room around the track for tuffblocks and pits, but that it is sufficiently narrow as it increases the "indoor effect" and perceived speed.

This one is looking fine, except that the intended location for my pits is a bit stuck behind the sand section. I might have to take some initiative there and reshape the stadium, as I don't really want pits in the middle of the track.

Other objects
Since I only want tuffblocks to have collision, I'm going to add the finish, start and triple objects in a separate file. I already have those prepared and I'm simple going to reuse them here. I will just change the textures as needed.

Now I have a full stadium, scaled properly, and a few objects to make the track look busy and "realistic". Starting to look fine from the stadium seats! (Keep in mind this is without any shadows still and with my work-in-progress textures for the track).


Now I have to move on to the collidable objects, the tuffblocks.

1062
Track Editing / Re: Building a replica SX - A2 2016
June 27, 2016, 10:32:01 PM
Step 8: Turning an obstacle course into a racing track.

Reaching that stage, I am fairly confident that all the lines are doable given proper skill level. I will simply run a few laps, see what other lines I want to take but can't for whatever reason and try to adjust the heightmap to make it possible. By now, I should make laps "flow" by taking beginner, intermediate and advanced lines fairly consistently. I am also paying attention to the difficulty increase between lines to make it not too frustrating, avoiding huge differences in skill requirements for different lines.

My heightmap now looks like this:


(I removed the potholes because it frankly wasn't fun).

My next step is thus to build at least 2 sections that offer different options for riders to cut each other off when racing, and provide replayability to the track.

I built my sand section this way already and it seems to be working out. I can run outside - outside, outside - inside, inside-inside and inside-outside with minimal laptime differences and it's fun.

There seems to be an opportunity at turn one, where currently the outside line with the rut is very single-lined and makes it a bit too easy to triple in. By lowering it slightly and adding an inside rut, I make it more challenging to triple in, and allow a shorter line that can step in (and actually triple in if you are ofmg good). It's generally nice to have inside ruts when it makes sense and allows for something special and fun (like parallel rythm sections with different rythm).

After the finish line, there is a dull turn that was a bit spiced up in the real track (no potholes, rather a wierd berm). I tried to reproduce the berm adding some off camber action to it to reward throttle control.

And no here is the final heightmap:


Reaching that stage, I have:
  • Different line options for different skills
  • Different challenges with section WFO and section you need to absorb jumps in
  • Some "conditional obstacles" to reward consistency (meaning you ahve to complete a section to get the next one flowing properly)
  • Different lines for the same skill
  • A "unique" obstacle that hasn't been seen in game yet
  • No funky falls due to unpredictible behaviour
  • Around 50 to 100 laps in.
I will leave it settle down for a day or two, seeing how I enjoy it and if there are any last minute changes I want to do. Then I will move on to object positioning, texturing and shadowing, and finally making all the finishing touches in trackEd (marshals, checkpoints and cameras).
1063
Track Editing / Re: Building a replica SX - A2 2016
June 27, 2016, 05:29:39 PM
Step 7: Whoops.

Now that my obstacle placement is close to optimal, I need to create and place my whoops on their intended location.

Whoops in real-life are monsters (3' heigh, 8' spacing, with shape that is steeper facing you). They simply do not work here. I tend to go with amateur-shape whoops: 2' heigh, 5' spacing with a "belly". Once again, gradients, curves and gaussian filters are my friends.

Whoops
  • Create a gradient with 3 to 5 bumps in it with regular spacing, using 100% linearity this time.
  • Create a new layer, select a large rectangle, apply the layer, reshape the rectangle to intended dimensions and rotate to put in place (slightly larger than obstacles otherwise objects are a headache).
  • Apply a curve to increase the belly - that means the opposite as for jumps!
  • Apply a gaussian filter to smoothen it out.
  • copy paste this to have enough whoops (usually there are 8 to 12 in a line).
  • Set opacity for desired height.
Doing this is not sufficient to have doable whoops. You need a step-in ramp and potentially a step-out one as well. This is easy: just create a small bump that is going to have 2/3rd of the height of your whoops section. You need to fiddle around with shape and height so it conforms to your whoop section. There is a LOT of trial and error involved here. I try to make new whoops for every track to spice things up.

Once they are ridable and reliable, I  move them around (and change the height) to scale difficulty, entry and exit speed.

I always make my whoops sections shorter than what they are in real life (3/4 of the total length but similar amount of whoops), as this allows time to straighten the bike up a bit better as it is still crucial in Beta4.

My whoop section looks like this in Photoshop and rides well (meaning I need a proper position and proper throttle control to go through, anywhere from second to third gear is reasonable). Notice the entry and exit bump and the overall big belly they have. Those are a 10+2 section that is intended to be ridden at full throttle in 2nd gear but can do done faster (but it becomes very risky, and then you have to break pretty hard to make the turn).
1064
Track Editing / Re: Building a replica SX - A2 2016
June 26, 2016, 03:34:06 PM
    Step 6: Berms and their placement.

    Now that my obstacle course looks ridable, I will include berms (in their own layers once again) to tie it all up together. It is going to be relatively easy as only 1 berm is not a 180° turn.

    The way I make berms requires 2 different gradients: one to simulate the "half donut", and one to make it gradually rise in size.

    Berms
    • Select in a new layer the size of the turn
    • Apply a gradient to it in a donut shape
    • Apply a curve to make the gradient gradually steeper on the borders
    • Multiply my selction by a linear gradient to make it gradually rise
    • Smooth it all with a gaussian filter
    • Select the intended height (between 4 and 6' usually in SX)
    I now have my formula (that some people disagree with, however I feel it allows a good impression of pushing it while not being too easy...) that I found after hours of experimenting building berms next to each other in a blank map.

    I start with this:

    And end up with this:


    And do it all over the map until I end up with a complete heightmap. Note that I intentionnaly left out the berm/ruts before the longest rythm as I need to study this more and have some ideas I want to try out. And leave a surprise for the actual track release.


    I will now play with the height and with it's placement to change the difficulty of each turn and rythm section.

    From now on, it's a matter of trying stuff out until it feels right. I might slightly change the scaling, jump faces and spacing, berm steepness and angles, etc. I will spend a LOT of time tring my best to allow different lines to be ridable, constantly aiming for an easy to learn, hard to master track. In between, I will sometime come up with betas I ask people to try when I get stuck on my own.

    Once everything is done and I'm happy with it, I will move on to proper texturing and objects, which I always do on a finished heightmap.

    And since this is going to take some time, feel free to provide feedback and questions below in the meanwhile!
    1065
    Track Editing / Re: Building a replica SX - A2 2016
    June 26, 2016, 02:39:28 PM
    Step 5: Advanced obstacles and sand sections.

    Doing the rythm sections around the track, I sometime realize that some lines are not doable currently simply because of physics. A good example are tables: on real tracks, tables are usually short with no visible lips and symmetrical. Riders compensate and make their lines work using body movement in coordination with bike suspensions to "bounce" or dampen when needed, which we cannot do properly here.

    Thus, I decided to do tables that would compensate for this. I'll call it "advanced obstacles" as it is just a fancy way to make more complicated shapes while still using photoshop. What I do there is build obstacles, still using the gradient technique, and add other layers to add flavour and options.

    Advanced obstacles
    • Get my obstacles down using a single gradient
    • Try it out in game and see where it falls short
    • Create a new gradient compensating for shortcomings
    • Select the obstacles, apply the new gradient on the selection but in a new layer
    • Superimpose layers on top of each other, playing with transparency until it works out.
    That's a heavily itterative process but it will make stuff work where it shouldn't. For tables, there are different ways to go (a "dip" in the middle, which you can get away with using one gradient only, a "lip" using 2 different layers, etc). This time, I'm going with the lip using 2 layers. Once I am happy with it, I will fuse copies of the layers and duplicate as needed.

    I am now at the stage where I have a complete map in regards of solid obstacles.

    I am now missing the "pot hole", sand section, whoops and berms. At that stage though, I can complete laps without cursing the obstacles too much, doubling or tripling true, using different lines. It is the backbone of the final track and already has to somehow flow.

    Next, I'm going to try to make a fun "pot hole" section. This was an interesting idea that didn't make it into the live event, but in my eyes it's an excellent opportunity to have a small section that will allow excellent riders to distinguish themselves from the rest of the pack while still being doable in a fun way by intermediate or even beginner riders. My idea is that people will absorb, double, triple or skim in there.

    Using a fresh layer, I'm going to add small dots of solid white that I will then smoothen using a strong gaussian filter to simulate dirt mounds, roughly, on the blueprint location. My rule of thumb here is to use a gaussian filter at least half the width of the mount. The first try will be 20px, 100% dots that I will use a 10px Gaussian Filter on. So a perfect gaussian shape, which I make approximately 1' tall.

    Looking like this on the heightmap:


    And like this in mapview:

    Being used to it now, it looks okaish. Probably a bit too high and broad, but as it is a first, I will leave it like this and try it out a few laps.  I already see 2 or 3 lines that look decent.

    Sand Sections
    Now, I will move onto what is now a classic in SX: Sand sections. To do this, I use layers in excess to add bumps, ruts and thickness in a creative way - sand sections move in real life, so I like seeing them as my own creative playground. I don't go in blind though and try to have a plan. Here I want 3 things:

    Thickness
    Sand tends to be added on top of the dirt fundation of the track. So I will simply take my former mask layer and simulate a pouring effect using a Gaussian Filter (our best friend in Photoshop!) with a rather wide effect (10 to 20 px). I will use this for thickness and for the texturing mask that I will now redo. Let's say that the base sand layer will be 1' high, so I aim for 10% opacity. I now have a 1' tall sand section that has been poured onto my track, instead of a flat sand texture, with blurry borders for the mask:

    Bumps
    As it is a long line with a turn coming in, there will be breaking bumps (1 layer) and wavy jumps (1 layer). Same as for obstacle building, I will use gradients that I will transform the shape of using gaussians and curves. Moving from a flat sand section to a "used" sand section.

    Ruts
    Coming out of a rythm section, and moving on to a rythm section, in between two turns... here is a good opportunity for ruts giving trajectories that might cross. The point here is to allow people using the ruts to go slightly faster, and allow 2 riders having nearly the same skills to cut each other off (once we enable collision). To do this, I will use TFC technique of tracing the line and then painting over it. Easy, fast and surprisingly efficient. I refine it by "cutting" the edges using a technique I will in depth on when talking about berms. I just need to keep in mind that outside is faster than inside, and thus inside ruts should be smaller usually.
    As it is a sand section, I do not care much how berms and bumps interact with each other yet. I will just overlay each layer.
    Here is my tentative sand section in Photoshop:

    And in Mapview!

    There are now 8 layers composing this single section, making it extremely easy to try, keep or discard each and ever single aspect. In my view, it should always be relatively subtle in the sand.

    Now, time to ride this a few times to see any obvious issues or improvement. Once I iron those out, I move on to berms.